Setting up and zeroing
a new scope on a gun is an awkward business often characterized by a lot
of trial and error. I’ve often seen newbie's at the public range where I
shoot go through boxes and boxes of ammo trying to get on target.
Sometimes I’ll take pity on a poor soul and stop what I’m doing to offer
assistance. Most of the time the frustrated shooter is grateful for the
help, but from time to time an individual will refuse or even get
indignant that I should be so presumptuous to assume that they need the
help. That’s ok by me, but it illustrates the fact that this whole
business can be costly in terms of ammo consumed, spent time, and plain
old frustration.
Consequently, a
bore sighter is one of the best investments that any scope shooter can
make. The traditional bore sighter is an optical device that kind of looks
like a short, fat rifle scope. It’s usually attached at the muzzle end of
the gun with a “spud” or rod that fits down into the bore. Different sized
spuds are needed to fit different diameter bores and so anywhere from four
to twelve will be provided in a kit. Some spuds have a little knob on the
end that are turned to expand the end of the rod to fit press against the
bore. Frankly, I find hauling around all this stuff to be a pain.
After the device is
placed on the gun, the shooter looks through the scope and adjusts the windage and elevation controls so that the crosshairs are superimposed on
a grid seen in the bore sighter optic. Traditional bore sighter's work well
enough to get you on paper but they suffer from the fact that the spuds
don’t fit very well in the bore. Even a little bit of looseness can
translate into multiple inches of error when shooting even at just 50
yards. So don’t expect the traditional to get you on dead center with
just the first shots.
Another problem
with the traditional bore sighter's is the fact that their designers assume
your scope is going to be mounted in a set of low rings. This isn’t a
problem for the regular once a year hunter with a standard 3 x 9 scope,
but for a competition shooter or anyone else with a target/varmint type
scope equipped with a large objective lens, there’s a problem. Those
scopes often require high or even extra high rings to allow those big
objective lenses to clear the top of the barrel. Consequently, the bore
sighter’s grid can’t be centered in the scope and can only be seen way
down at the bottom of the image. With that being the case, the bore
sighter can only help you with the windage and not the elevation.
The new Leupold
“Zero Point” magnetic illuminated bore-sighter eliminates all of the
problems associated with traditional devices. For one, instead of using
spuds, it attaches to the muzzle with a powerful neodymium magnet. (Keep
the Leupold bore sighter away from any data storage devices or media. It’s
strong enough that it could zap your digital info out of existence.) This
eliminates the need for carrying around that clunky bore-sighter kit with
all those spuds and the big optic. The Zero Point is very compact and
measures just 4” long and is a 1/2” by 3/4” around the middle. However,
being four inches long means that it can reach way up to the center line
of just about any scope. It even comes with a neat little ballistic nylon
carrying pouch that gives it plenty of protection and can fit on a belt
besides.
Using the Leupold is easy. If you’ve put a new scope on a gun, just turn
on the Zero Point by pushing the large slide switch located on its side
and stick the unit onto the muzzle. Now look through the scope and you’ll
see an orange grid pattern with various reference numbers along the sides.
Move the bore-sighter up or down to get the grid located in the center of
your scope’s image. Next, turn the power ring of your scope back and forth
(if it’s a variable) to get the best amount of magnification on the grid.
We want a nice, clear, lens filling picture. Now orient the bore-sighter so
its grid and your scope’s crosshairs are aligned both vertically and in
parallel. In other words, we want everything to be squared up. Then by
using the scope’s adjusting knobs, move the crosshairs so they’re
perfectly aligned with the center of the bore-sighter grid.
Once we have
everything lined up, take the bore-sighter off and fire a shot on a sighter
target at 50 yards. Chances are the shot will be off dead center but still
on the paper somewhere. Now put the
bore-sighter back on, and square its grid to the scope’s crosshairs once
more. Look through the scope and get the crosshairs on the center of the
target. The Zero Point is kind of unique in that because it’s so small,
you’ll be able to see it’s grid and the 50 yard target at the same time.
Now use the adjusting knobs and move the scope’s crosshairs over the
bullet hole. (It’s very important that the gun not move during this
process.) The scope is now perfectly zeroed. I
went through the Zero Point set up process recently and it got me to
within a half inch of dead center at 50 yards on my second shot. That’s
pretty darn good in my book. So if you want to save time, money, ammo, and
most of all, aggravation, when sighting in a scope, get a Leupold Zero
Point.
Alpen Scores Again
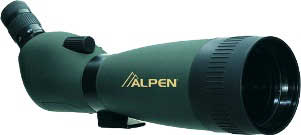
Some months ago I
did a review of Alpen’s 80mm spotting scope - the model 788. I found the
scope to have quality optics, was good looking, and had many features
(like full immersion waterproofing) usually found only on much higher
priced products. Best of all, the 788’s price is extremely affordable i.e.
typically around $350 or so.
|
 |
|
Alpen 80mm
Model 788 |
Well it turns out,
that I’m not the only one that thinks the big guy is an exceptional product
for the price. “Outdoor Life” Magazine has again awarded Alpen one of it’s
“Best Buy” awards for 2005. This time for the 788. It’s interesting to note
that “Outdoor Life” has been giving out these awards for different categories
of products now for six years, and Alpen has won in one category or another
for five out of those six times. Kind of tells you something about their
products doesn’t it. Like - yes! It really is possible to get high quality at
reasonable prices. Congratulations to Alpen - the working stiff’s optical
outfitters.
Leadheads Bullets
Was chatting on the
phone the other day with my good friend Tommy Mace from Leadhead’s
Bullets. As you probably know, I consider Leadhead’s to be the absolute
best quality commercial cast lead bullets on the market. We eventually got
around to talking about my Shot Show coverage of the new Smith & Wesson
460 and what a great concept it was. If you remember, I mentioned that any
bullet suitable for the 454 Casull would also be suitable for the 460 as
both had very similar working pressures. That’s when Tommy mentioned that
his 335 grain gas checked 45 caliber bullet would be an ideal match to the
460. I definitely agreed. It would make a perfect heavy alternative to the
200 grain Hornady spire point that I saw at the Show. Tommy also said he
had a 395 grain bullet available that he once used to shoot completely
through an 24” oak tree. Now that’s what I call penetration.
The thing I like
about Tommy’s bullets, other than the fact that the quality is so good, is the
fact that they’re made from an alloy that’s plenty hard, but not so hard that
the bullet won’t upset to completely fill the grooves of the barrel. As a
result, you won’t ever have to worry about the possibility of gas blow by and
leading. I’ve used a wide variety of Leadhead’s bullets over the years and
never have had a bad one. I think that’s says a lot, and as a result I won’t
use any other brand of cast lead.
|
|